S2K antenna swap into a miata (NA) |
Author: SRN DI G SAO |
|
This is a fairly straight forward install with only two small steps that require more than an amateur level of install knowledge.
Time: 1 Hour
Dificulty(1-10): 2
To begin, what you will need are:
- OEM Honda S2K Antenna
- Radio Shack 6"-1' radio antenna extension, male to female
- 10mm box wrench
- 10mm socket(for back up)
- Phillips Head screw driver
- Some form of Channel lock, or vise grip
- Cut off wheel/hammer and long flat head screw driver
|
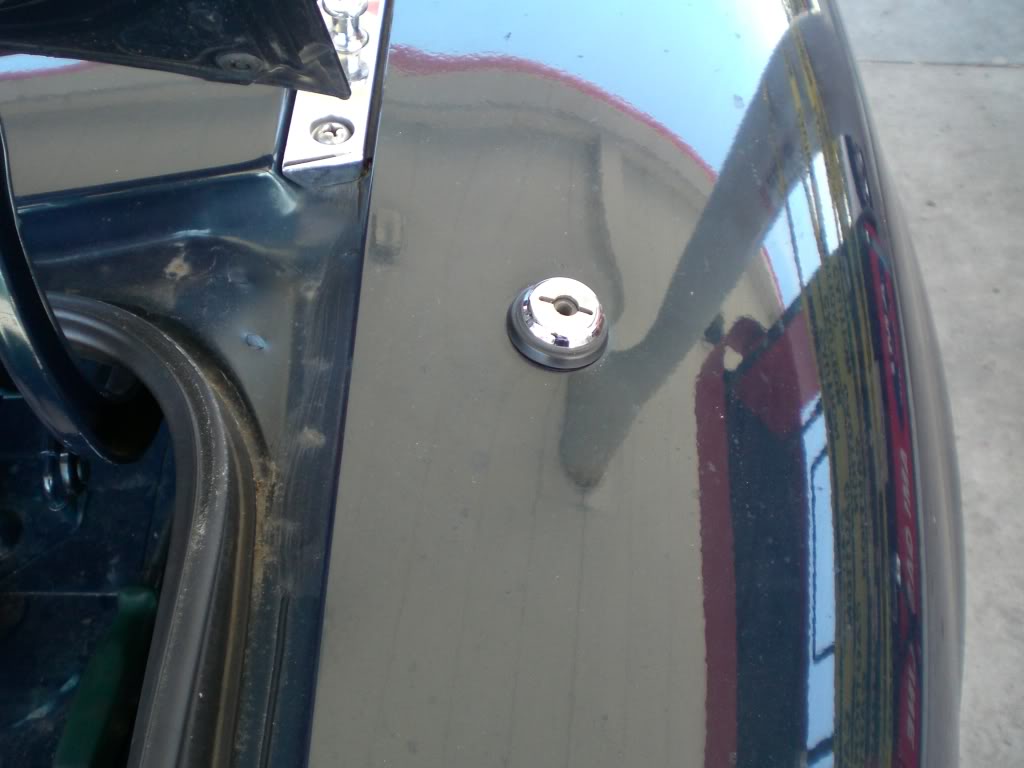
| First step is to unplug the antenna and remove any trunk liner you have. My car did not have a trunk liner, so it made it just a hair easier. Next remove the stock antenna. The stock mast is screwed in and little WD40 goes a long way to easing the antenna out. The car should look like this: |
 |
Next, move into the trunk and begin undoing the misc. 10mm bolts holding the stock lower housing to the car. Some will think its crazy to remove these without removing the top portion of the antenna, but I found the twisting motion with the bolts connected was tweaking the little lower tab.
Remove the two bolts in the lower right corner: |
 |
| and the Phillips screw that holds the lower mast: |
 |
| Now with the lower rod in your left hand, use the channel locks/vise grips to slowly turn the antenna top (Warning, this may mare it). It should come out easily, but a little bit of liquid encouragement can go a long way. Most of these have been stuck in place for a very long time. |
| Once the top comes off, you're left with the bare bottom mast: |
 |
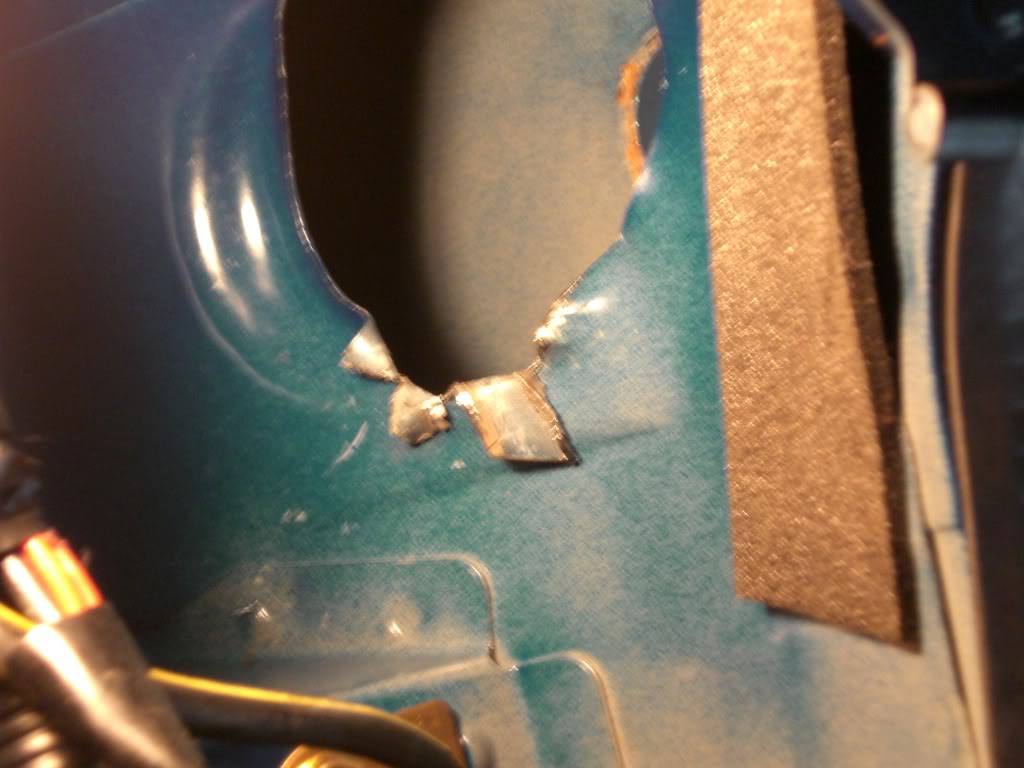
| Which should slide out easy. Now comes the hard part. After completely removing the stock antenna, you're left with a cleanly cut hole in the side of your car. Unfortunately, the S2000 antenna sits at an angle, not straight down like the stock antenna, and wont clear the lower section of the body. |
 |
| I had a cut off wheel handy so I cut to indentations into the car and bent back the tabs, but a large screw driver and hammer should do the trick. No need to go crazy, the hole is only off by a few mm. No need to tear up the body unnecessarily. |
 |
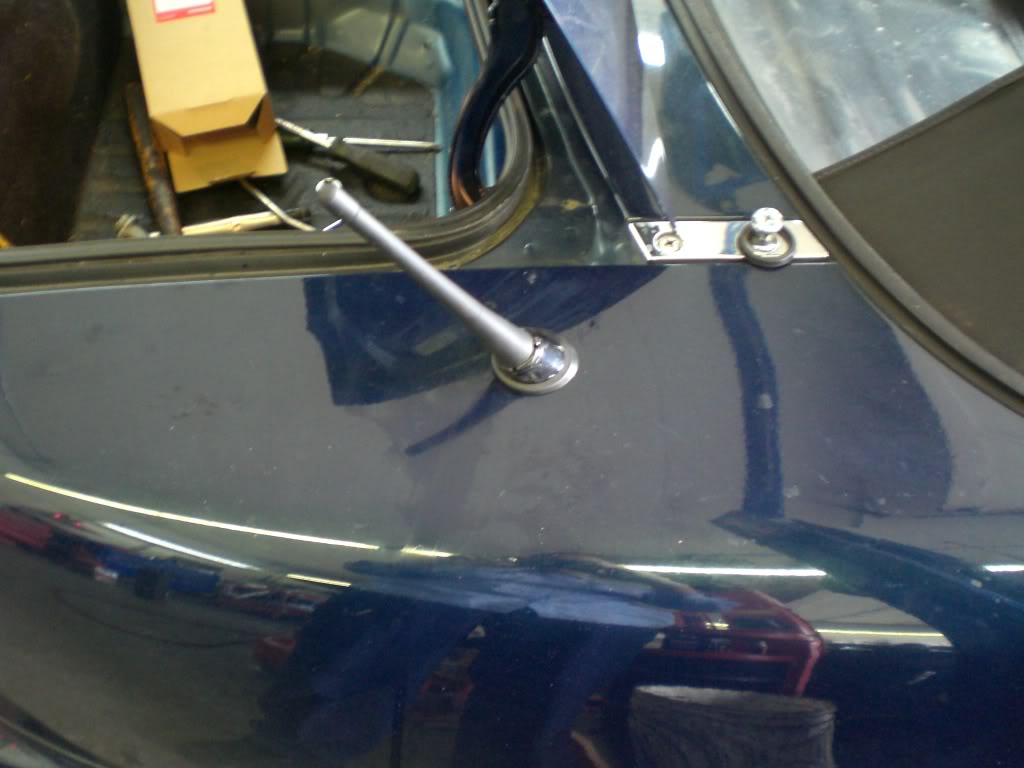
| After that, the two pieces come together easily, the top of the S2K antenna screws into the bottom, and the seals line up near factory(98% perfect). Connect the antenna extension, and you're done! |
 |
| Or, for those that really want to go all out, you can complete the second part. The S2000 antenna comes with its own amplifier, and a built in to prong connector. The Miata was left in the dust in this regard and has nothing like this in the rear, but a quick look up of the S2K wiring diagram shows this plug going into a simple power and ground harness. That means all you need to work the integrated amp is a power and ground connection. Luckily, Mazda wired all Miatas similar, and those without the power antenna still have the body wring harness to hook into a power source and a ground. For this you'll need a few more tools and basic understanding of vehicle wiring. I don't recommend it for the electrical squeamish, but if you do have the guts or the knowledge its not that hard. The plug that provides power to the stock Miata power antenna is located in the middle left corner of the following pic: |
 |
| That plug has four inputs, Power, Ground, Ignition, Radio. We're only interested in the power and ground. Splice together two 6" sections of wire, both with one end of male and the other end of female connectors. The ground on the Miata harness is black, as is the ground on the S2000 antenna. Power is solid red on the Miata plug, and yellow with black stripe on the S2000 antenna. Hook these up and turn on your radio. Hear anything special? You won't, but according to Honda you'll get little to zero interference when driving along the border of radio signals. |